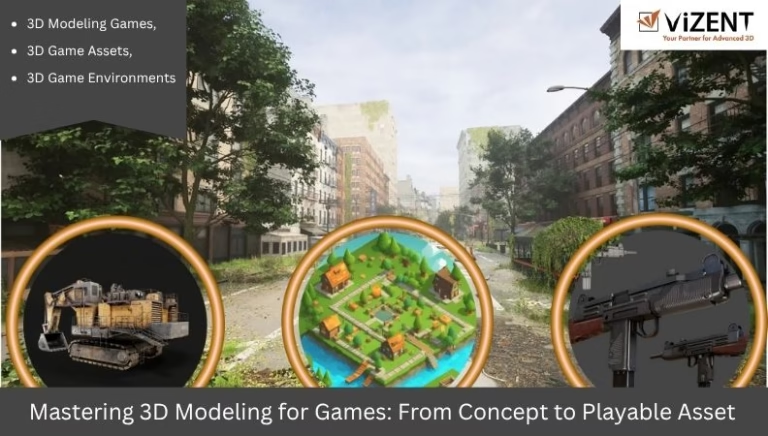
From Concept to 3D Game-Ready Assets and Environments
In today’s dynamic gaming industry, 3D modeling games are not just an art—it’s a science, a craft, and a crucial part of immersive game design. Whether you’re building a stylized fantasy world or a hyper-realistic war zone, mastering the pipeline from concept to playable asset is vital.
Understanding the Role of 3D Modeling in Games
3D modeling games involve the creation of digital objects. Each of these elements starts as a concept and ends as an asset integrated into a game engine like Unity or Unreal Engine.
Mastering this journey means understanding each step in the modeling pipeline and how it contributes to the final player experience. From poly count restrictions to texturing and rigging, every stage is designed to optimize performance while maintaining visual fidelity.
From Sketch to Concept Model
Everything begins with a concept. Concept artists provide 2D illustrations or mood boards that give direction to the 3D artist. Once the idea is approved, a base model is created using software like Blender, Maya, or 3ds Max. This model is usually a low-poly version to quickly block out proportions and test visual style. This model helps establish how the asset will interact with other elements in the game world, especially within large 3D game environments.
High-Poly Modeling and Detailing
Once the base is approved, artists create a high-poly model to include intricate details—wrinkles, bolts, armor plates, etc. This step allows for rich sculpting using tools like ZBrush or Mudbox.
While the high-poly model won’t be used directly in the game due to performance limitations, its data will be baked into textures or normal maps applied to a low-poly game asset. This process allows games to show detailed models without high processing costs.
Retopology and Optimization
After sculpting, the next step is retopology—converting the high-poly sculpt into an optimized low-poly mesh that can be animated and rendered efficiently in real-time.
Game engines prefer optimized assets to ensure smooth gameplay. Models need to be as low-poly as possible while retaining essential shapes. Techniques like LODs (Level of Detail) are used to display simpler versions of an asset when it’s further from the camera.
UV Mapping and Texturing
Next comes UV unwrapping, where the 3D surface is flattened into a 2D layout so it can be textured. A clean UV map is essential for creating seamless and high-resolution textures.
Using tools like Substance Painter, Photoshop, or Quixel Mixer, artists paint textures onto the model, giving it life through materials like metal, fabric, wood, or skin. Proper texturing is crucial to make 3D game environments feel rich and believable.
Textures may include:
- Albedo maps (base color)
- Normal maps (detail from high-poly sculpt)
- Roughness/metalness maps (reflectivity)
- Ambient occlusion maps (depth and shadows)
Together, these create the visual magic behind every impressive 3D game asset.
Rigging and Animation for Dynamic Assets
If the model is a character or an object that moves, it will need a skeleton or rig. Whether it’s a humanoid hero, a mech robot, or a destructible barrel, rigging and animating assets make the game world dynamic.
Animations can be hand-keyed or motion-captured, depending on the game’s needs. They are usually stored in the engine as reusable assets or animation states.
Integration into the Game Engine
Game engines like Unity and Unreal Engine support a wide range of formats, including FBX, OBJ, and glTF. The asset is then placed in the environment and tested for scale, lighting, shadows, and physics interactions. Artists might tweak shaders, update normal maps, or change textures to better fit the 3D game environments. This phase also involves assigning collision boxes, setting up LODs, and ensuring the asset performs well on various hardware platforms.
Creating Cohesive Game Environments
While standalone 3D game assets are important, the real challenge lies in building entire 3D game environments that feel alive and coherent. A well-modeled environment includes everything from terrain and vegetation to lighting, atmospheric effects, and audio triggers.
For example, a sci-fi corridor needs not just pipes and doors but also flickering lights, vents with steam, and ambient sound. All of this starts with modeling and ends with immersive design.
Tools like Houdini, Gaia, and World Machine help procedurally generate terrain and assets for large environments, speeding up production without compromising quality.
Testing, Iteration, and Polish
Game development is iterative. Once assets are in the game, they are tested by QA teams, artists, and developers. Feedback may include:
- “This prop looks too high-poly for mobile.”
- “Animations don’t loop smoothly.”
At this stage, 3D modeling games become collaborative. Artists revise models and textures, optimize draw calls, and ensure that each asset fits the game’s visual and performance standards.
Final Thoughts: The Art of Playable Perfection
Creating a playable 3D game asset is not just about good modeling—it’s about pipeline efficiency, artistic vision, and technical precision. By mastering this end-to-end workflow, artists can elevate their skills and contribute meaningfully to next-gen 3D modeling games. Whether you’re building cinematic environments or stylized props, knowing how to take an idea from concept to controller makes all the difference.
Conclusion
The world of 3D modeling games is vast and constantly evolving. Artists who learn to master the full pipeline—from conceptualization to final implementation—will always be in demand. Whether you’re designing standalone 3D game assets or expansive 3D game environments, understanding the workflow, tools, and best practices will help you create assets that not only look good but also play great. Embrace the process, experiment boldly, and watch your virtual worlds come to life.

CEO & MD
The CEO and Managing Director at Vizent Solutions, Bigyan Kar, leads a team of talented technology professionals who excel in the development and implementation of next-generation 3D visualization solutions for the following areas: gaming, architecture, AR/VR, CAD, and interactive simulations. Through his knowledge of digital design and technology, as well as his commitment to providing the highest level of immersive, accurate, and reliable 3D experiences for its clients, Vizent is constantly innovating and pushing the boundaries of the 3D modeling and visual storytelling industries.